
My top tips on how to take jewellery photos – part 2
In last week’s post I shared with you what camera and light sources I use when taking photos of my jewellery. In this week’s post I will talk about what else you need for taking great jewellery photos and how I set up my own camera.
A good eye for what makes a great photo.
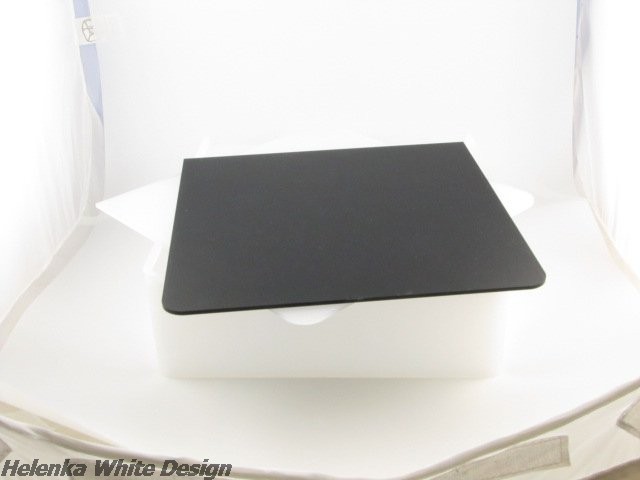
It’s always good to play around with different angles and taking close ups of details such as beads, a signature or an unusual clasp. You might also want to play around with different props. Some people use found objects such as sticks or shells – whatever works for you and looks pleasing to the eye without distracting from your object. I tend to stick to a minimalistic and clean approach, so I use traditional props – mostly white or frosted white busts or acrylic earring stands etc. and my riser – it comes with a frosted white insert and a smooth shiny one and a black frosted/shiny insert. I have to admit I still haven’t quite worked out how best to photograph items with black background and rarely do so –only when I have items with Rose Quartz as you can’t really see the beads against a white backdrop.
I recently invested in a black leatherette bust because the velveteen looks fuzzy in photos. I have to experiment with this one and I am toying with the idea of using a greyish gradated backdrop.
I love my riser as it’s very versatile. I tend to take several photos of my jewellery and upload up to five. I want customers to have a good impression of my pieces – and that includes how it looks on a bust, detailed shots of the items or even the back where appropriate. Sometimes I use the shiny riser which means you can see a reflection of the piece on the surface. I use it for necklaces, bracelets and also for earrings.
Earrings are notoriously difficult to photograph as they dangle and take a while to stay still – that’s why I tend to take one shot of them on the earring stand and one on the riser.
I also take photos in both modes – landscape and portrait. Mainly because some items like bangles and cuffs are better for landscape shots and also in view of using the photos for things like Facebook and Google+ covers and for those landscape photos are better. I also always keep my photos in the original size (which is massive) and the small version. The small version is for the website and social media sites, while the bigger versions are there just in case. For example if a magazine asks for photos you want to have it in a large size, which you can change to the required size. I have not always done this and regretted it as I had to reshoot items. My camera has a function that allows me to resize straight away, but you can easily do it in Photoshop or other editing programs (and with more choice).
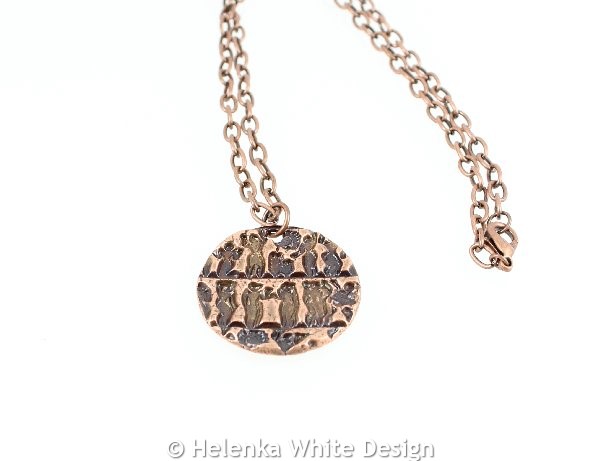
Time & Patience
Yes, you need both – you can’t rush these things. I tend to wait until I have enough items to photograph and photograph them in one session – mainly because setting it all up is a lot of hassle and I don’t want to do it every time a new product is finished. If I have say 12 items or so to photograph it takes me at least two hours – and that’s before uploading them and then choosing the good ones. I always take way more than I will use in the end. This is because I rather have lots to choose from then ending up missing a good shot and then assembling the tent and lights again!
Choosing the best shots and editing them takes at least two hours.
I am not very au fait with editing programs and stick to the minimum – resizing if necessary, rotating and cropping. No retouching. What you see is what you get.
This is why often my customers tell me that my items look even better in real life – and that makes me happy.
Camera settings I use.
This is the set up I use and learnt from the instructions which came with my EZ cube. First I turn off all lights and also close our blinds so I will only rely on the lights which came with the tent. The reason for this is simple – you don’t want to mix your light sources.
If you want to use your tripod do so.
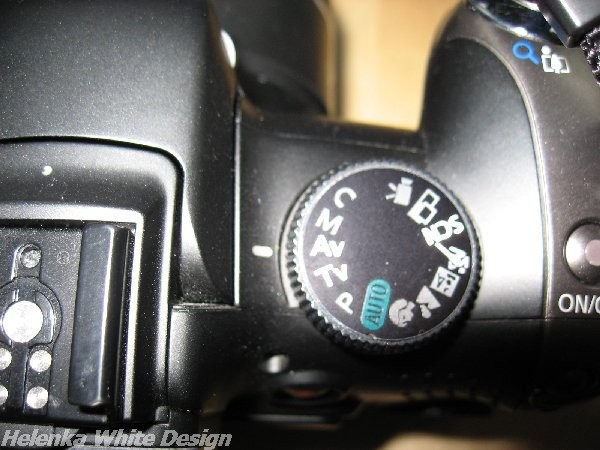
I then set the wheel of my camera to AV – which stands for Aperture Priority and set it to the highest Aperture in my case this is 8 (it will be different for each camera so check out your camera and familiarise yourself with its settings first). I also make sure the lens is clean.
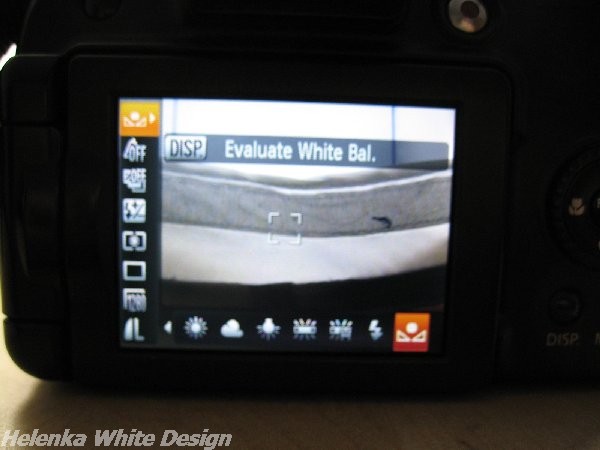
Next thing I set is the Custom White Balance – I do this by going to this section on my camera, point the camera to the back of the cube which I use as my reference white. For a gradated or coloured backdrop you would set the reference white first before placing the backdrop – however I have not used a non-white backdrop yet.
And then I adjust the Exposure Compensation to +1 1/3 – however I tend to vary this depending on the item I photograph.
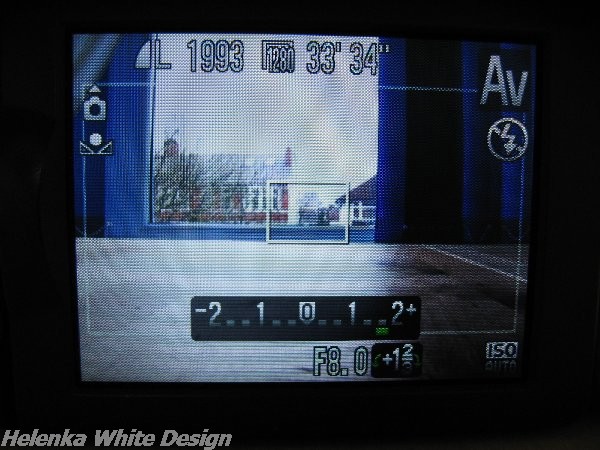
Some items require you to go one higher or lower. This is also why I end up with way more photos, because I play around with this setting – you can easily over or under expose and you can see the results best on the computer – so I take extra shots.
And these are the basic settings. For close ups I use the macro setting and move the camera close to the object. My camera even has a super macro.
When taking the photo it’s important that you see the green square in your view finder – if it’s yellow the item on the photo will look blurry. Make sure to press your shutter half way down until the green square shows up – you might have to adjust your Exposure Compensation if it shows up yellow. Without taking off your finger press the shutter once your object is in focus. Sometimes it takes a bit of experimenting to get the focus right. When I take shots of the whole bust for example I forget that I use the zoom and when I then want to take the close up shot my camera “complains” and shows me the yellow square. I then turn the camera off and on again and set it to the macro – and hey presto the green square appears.
Taking photos doesn’t have to be super difficult, but it takes time, patience, a good eye and the willingness to experiment and learn. Sometimes I check over the photos on my website and decide to reshoot photos – I want them to look as good possible. And I know that I can still improve on my photography.
I hope my article has given you a bit of an insight on how I take photos and maybe you could take away some ideas for your own photography. Oh and if you want to know how I watermark my images after editing – I use this watermark program for creating quick watermarks (the ones you see on the photos showing the camera and props) and for all my product photos I now use this program (the free version).
I would love to hear from you – please leave a comment below and share this post if you like it.
Thanks for reading. 🙂
PS: This article was written in 2014. In 2016 I got a new camera – a Canon DSLR EOS 1300D, because my Powershot developed a fault that couldn’t get repaired. Since the new camera is a DSLR it’s more complicated to use. However the same principles apply to taking photos. The photos showing my old camera were taken with our old Canon Ixus. The props were taken with my Powershot. The images of my products were taken with my new camera.
April 7, 2014 @ 9:52 am
Hi, as someone who has a good eye, is creative, good at photography and loves cats…any chance you could help out with taking pictures of black cats? I have a beautiful black cat and I wish i could capture better pics of him. Easier said than done. Any tips?
April 7, 2014 @ 1:40 pm
Hi Jo
Thank you for commenting on this post. I know – black cats are even trickier to photograph than other cats. I am lucky with our Bobby as she is used to the camera and mostly co-operates. Plus as you might have noticed she is white and tabby. With black cats it all about the eyes and whiskers. Every black cat has unique eyes which makes them very special and beautiful. Giving advice is of course tricky as I don’t know what camera you have. Our camera comes with a portrait mode I often use when I photograph her, or when she is very active I use the continuous mode. Apart from that it’s aLways best to take your cat outside when it’s sunny. A friend of mine suggested also to avoid flash, use natural light – and try using light from top right or left corners . Make sure you do not under expose so opte for a smaller aperture number. Best to to just experiment. If I can find more advice I will post it here again. Good luck:)
April 28, 2015 @ 6:47 pm
Helen – this is great! You’ve gone to lots of trouble to point out the key areas to focus on ( pardon the pun). Probably the best place to start for me will be the tent and white backgrounds then see where I might need to go with a new camera. Thanks again
April 28, 2015 @ 7:00 pm
Thanks for your comment and reading the blog. I am glad it is useful to you. It took me a while to learn all of this.I still struggle with black backgrounds and very shiny items.