
9 things I learnt from my month of painting with alcohol inks
Last month (February) I spent the whole month with painting with alcohol inks. It’s a medium I have used in the past with polymer clay. Last year when I reviewed the May Scrawlr subscription box (you can find the review here), I enjoyed playing with these so much that I ended up buying more alcohol inks by Marabu, Ranger, Pinata and Jackson’s Art and other supplies I needed to get started.
I also bought a book, which I didn’t find that useful and ended up watching a lot of alcohol ink artists on YouTube. I experimented with various techniques and I wanted to share some of my results here you can find more examples of my experiments in my YouTube video.

Painting with alcohol inks: my experiments
One of the first things I tried was the tilting method – meaning you tilt the paper to move the ink.

Then I also tried to create rings. I tried several things that didn’t work well: a paper cup, a plastic cup, a cookie cutter, lids and this jam jar upside down. It took a while to get the hang of it. Creating circles without mucking up the centre proved to be rather tricky as I kept knocking the glass, so it moved and the ink seeped into the middle, so I had to work carefully. Here you can see some of my various attempts using different inks on photo paper. I use the photo paper really just for practice. You can correct things, but eventually you won’t be able to get the stains off.


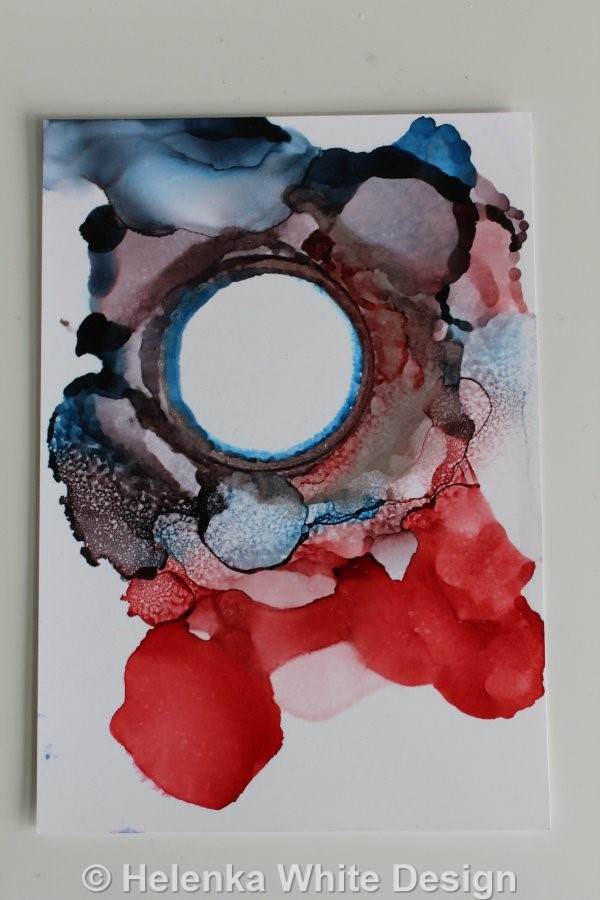

I used Ranger black and teakwood on photo paper first and really liked how the colours changed and you can see blues and greens coming through. So, I tried these two colours also on another photo paper and then I tried them on Yupo paper, which behaves very differently. The paper stains easily – this can sometimes work very well like with these two colours, when you paint over them. When you add a drop of ink to Yupo it just spreads. This is definitely a winning colour combination.


After watching several videos by Danish artist Randi H Art, I tried to create lines and fades with my heat tool. This takes a lot of practice, to get right, so I need to spend more time with this technique.

Then I watched a tutorial on another channel which showed how to create abstract landscapes using a lot of blending solution, rather than rubbing alcohol (IP). This was tricky to do on my photo paper as the back runs produced ugly stains, but I got the idea of how to achieve such a painting. I also tried it on Yupo paper, but not very successful as you can see.
Then I tried another landscape and here I used masking fluid to mask off the line between sky and foreground. For the foreground I used blue and yellow. Once the inks were dry, I peeled off the masking fluid and filled in the gap with more yellow and blue with a brush. I actually like how this one turned out and will probably paint a few trees and bird in with posca pens. So, this isn’t really finished.


With this piece I just wanted to learn how to use a brush and create brush strokes.

I wanted to try out painting cats using the dry brush technique. I originally created 4 paintings on Yupo paper, but messed one up so badly, that I threw it in the bin!
For my first attempt I created a thin circle with masking fluid, which turned out way to thin. Then I painted the background with purple and blue and some of that colour seeped into the circle. I then worked on the cat with teakwood, black and white. I had problems with the colours seeping into the background as you can see with the tail and the cat’s fur. For the eyes I used emerald ink, but that spread too far, but I managed to cover that with the teakwood. The nose was painted in with an alcohol marker, for the rest of the details and the circle I used Posca pens.
With my next cat I tried to avoid my earlier mistakes. For the eyes I used an alcohol marker pen and for the nose and lips and Posca pens for the other details.
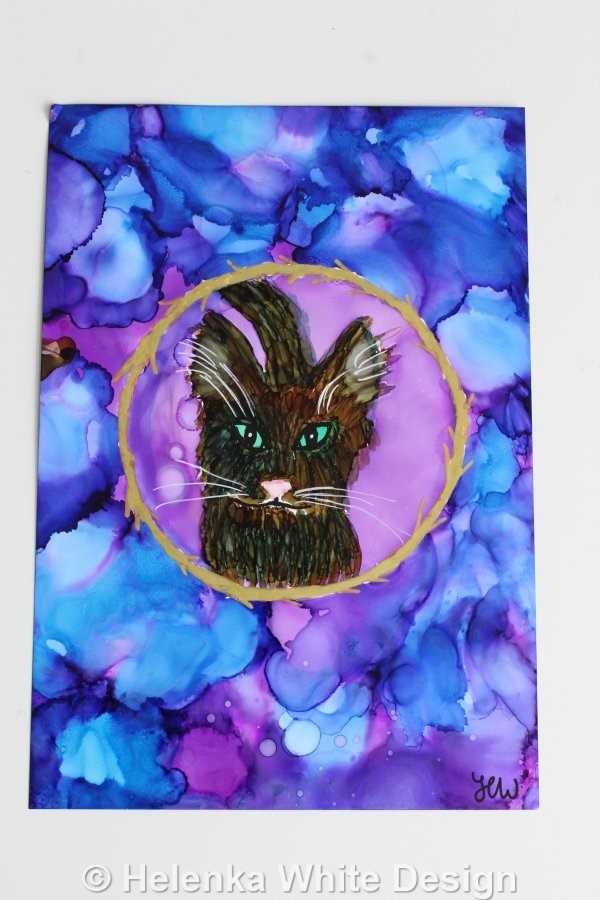


For my final cat I tried it painting it without a circle and again messed up a few times, but I still like the result.
For the next two flower paintings on Yupo paper I used masking fluid for the shapes. Unfortunately, the ink didn’t behave (it rarely does) and it spilled over and seeped into the other areas. I ended up painting the lines of the red flower with gold Posca pens and alcohol markers. I will probably attempt more of these flower paintings.


Here I tried another landscape. I first thought of adding some details with a black marker, but then I decided against it and left it like it is.
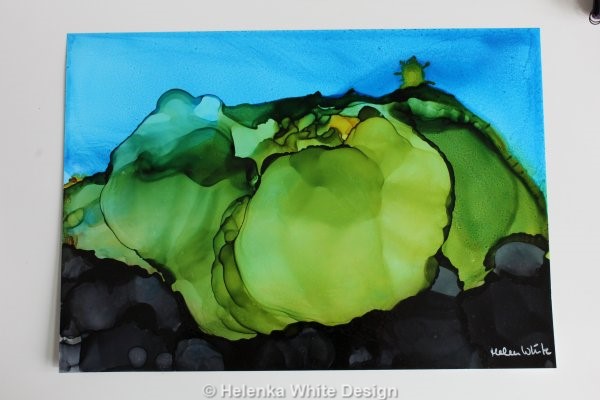
I wanted to paint another cat and this was quite an effort as I kept reworking the background and then the ink seeped into the fur – so I ended up reworking that. The circles I initially painted in with fluid didn’t quite disappear which is a bit annoying. Anyway – I think I managed to rescue this painting and think it looks rather cute. This was also painted on an A4 size Yupo paper.

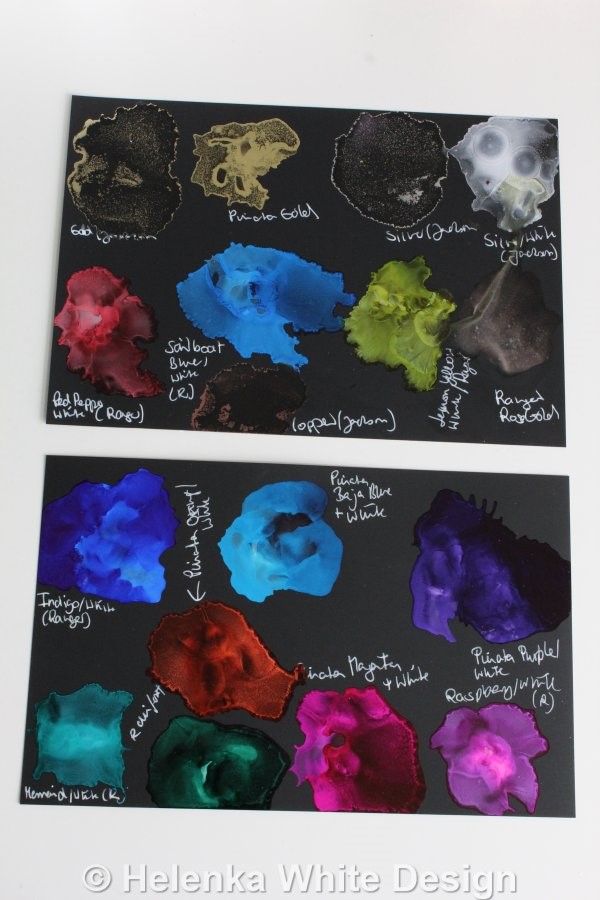
I have recently bought black opaque Grafix paper, because I wanted to try out working with a black surface. Before I attempted some paintings, I tested my various inks with added white on these papers. Some beautiful colour mixes came through as you can see.
Working with canned air isn’t easy, as you can see here. I honestly can’t recommend it It’s messy, you have little control and your hand freezes quickly! One can doesn’t last very long. I will probably clean these paintings off and use them for another project.


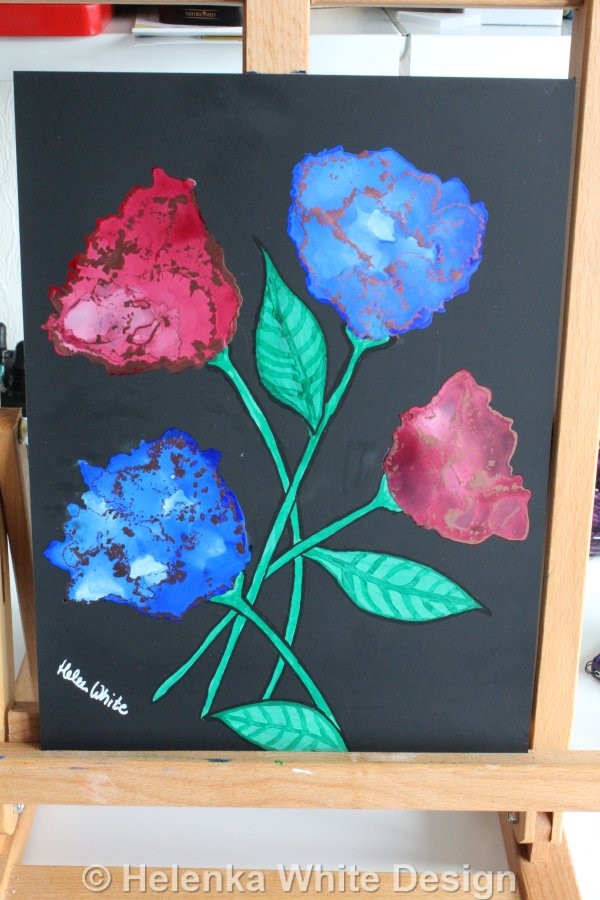
Here I tried some flower shapes. I noticed that it’s really not that easy to wipe off mistakes – as you can still see the residue on the black surface. Originally the flowers only had stems. I tried to cover up the stains and added leaves. On this one, the leaves’ veins were added with alcohol ink. While in this one I used black Posca pens instead.

Here I wanted to create some sort of night-sky using a lot of gold. I loved the way the Jackson Poppy reacts with the white and created these two paintings.


This one has also copper added to it, though not sure if I like it. I think I went a bit mad with the copper.
I have also invested in Nara paper, it’s quite expensive but has been recommended by many alcohol artists as you can wipe off any mistakes with isopropyl alcohol and it won’t leave any stains. I absolutely love this paper; it is very forgiving I wiped off a lot of the flowers until I was happy with how they looked. I will probably paint more flowers and try a cat on this paper in the future. This painting and some of the others will soon be available in the shop.

So, what have I learnt? Here are my 9 tips for you if you want to try out alcohol inks
- Invest just in a few colours. I know you can get really tempted to buy them all, but just buying a few bottles of your favourite colours or colours you can mix will give you a good idea whether it is the right medium for you. Metallic inks are also very nice and give great effects, so you might want to invest in gold, copper or silver. Alcohol inks can get very expensive, especially the popular brands such as Pinata, Marabu and Ranger. I recently discovered alcohol by Jackson’s Art Supplies and they are great to work with and way cheaper. You can also buy small bottles of 10 ml, 30ml and big bottles of 50ml. You can find a review of these inks in my playlist. You will also need to invest in a bottle of rubbing alcohol. I bought mine from eBay. The alcohol is for diluting and is also used for various techniques.
- Other useful things you need: paper towel, cheap brushes for painting, cups for diluting inks, spray bottle and bottle with a fine nozzle for the rubbing alcohol. I find ball point stylus tools also very useful for creating dots.
- Surfaces: Surfaces for alcohol inks need to be smooth and there are several synthetic papers on the market, but these papers can get very expensive. Cheaper alternatives are smooth tiles, which you can easily wipe off, if you don’t like your painting, or photo paper. You can use also try other smooth surfaces you have available – I could imagine that acetate works well or any type of plastic. Nara paper, Grafix and Yupo paper are all more expensive and work differently with ink. Most people find that the ink spread on Yupo and you can’t wipe off mistakes without leaving stains. It’s also not so great when using the heat gun! However, it works well if you layer colours and like the effects the paper produces. Nara paper is popular because you can wipe it off and if won’t stain, so you can rescue your painting or start all over again. Same with Grafix paper.
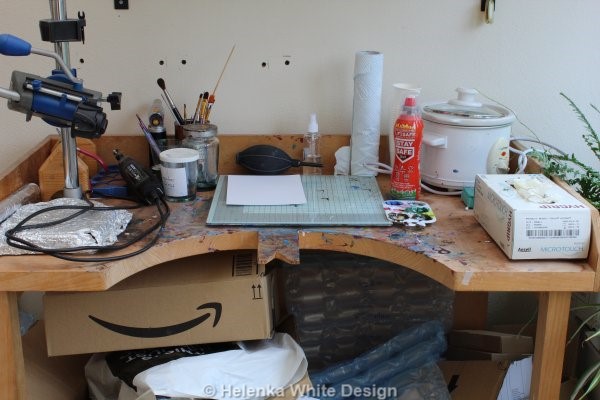
- Safety first: Invest in gloves, a hand blower (instead of using a straw) and work in a well-ventilated room. I work downstairs in our conservatory which is unfortunately cold and I have the window open. I also have a respiratory mask, but it’s not super comfortable to wear and with stinky inks like Marabu I can still smell the ink through the mask, I probably need to adjust it better. If you don’t like the idea of a mask, have plenty of breaks in your painting sessions and set yourself a time limit. The gloves are for preventing stains on your hands – plus alcohol inks dry out your skin!
- Just play around and experiment and learn how the colours react with the paper. Every time you buy a new brand and colour of ink – make sure to create a swatch.
- Don’t give up too early! I found at times, that I got a bit frustrated as I didn’t get the results shown in the videos, however I also noticed that the artist in the video used different paper and also a different heat source (hairdryer).
- Combine inks with other media – Posca pens work great for finer details and so do alcohol markers. This is especially useful for doodling too.
- Alcohol inks are not light fast. They fade when exposed to sunlight. This is why alcohol ink artists apply two types of spray on their paintings – check the name of bottles. First a couple of layers of Kamar Varnish by Krylon and once that’s dry a couple of layers of Krylon’s UV Archival vanrish in gloss or matt. Both sprays have an awful smell and it’s best to do this in a well-ventilated room (for example your garage) or if you have good weather – do this outside.
- Get a proper mount for your masterpiece before you frame it. Randi shows you in her video how she frames her paintings. If you frame your painting without a mount, the paint will stick to the glass and it gets ruined. This is not my experience, but I learnt that from a post in the Facebook group “Alcohol Ink Art Community”.
Will I pursue painting with alcohol inks as my go to art form?
I will certainly continue using alcohol inks, as I enjoyed painting with them.
With a lot of practice and patience you can create beautiful paintings.
However, because of the safety issues and the fact I don’t like working too long in the cold conservatory, I wouldn’t want to work with alcohol inks every day. I think the medium works very well for abstract paintings, but it poses some serious challenges for creating representational style paintings. You certainly need a lot of practice for these and patience. The canned air didn’t work for me, so I am planning to invest in an airbrush, as this is something a lot of artists are using with the inks.
I hope you enjoyed this post. Let me know in the comments below.
Thanks for reading.
Helen x
August 11, 2023 @ 10:02 pm
This is a very good article that addresses the ease and difficulty of using alcohol inks. Especially useful is the paper and painting surfaces descriptions. Techniques are described and include photos of results—good and not so good. Best article I’ve read on alcohol inks and I’ve been looking for good information. Highly recommend!
August 12, 2023 @ 2:26 pm
Hi Amanda
Thank you so much for your kind comments. That’s great that you found the article useful. You can see a a more visual version of my alcohol ink experience on my YouTube video here: https://youtu.be/f51wpLRTELA
If you live in the UK I can recommend Jackson’s Art own range of Alcohol inks. They are more affordable than the other brands.
Happy painting.
Helen