
Polymer clay animal sculptures: part 2
In this second part of my two part series I share with you how I made the sculptures you can buy in the shop.
One of the first sculptures I made was this gecko sculpture – the body was created first without an armature and the legs were added to it. I made the reptile skin using a texture sheet, which was fiddly as it was stiff and therefore the clay not so easy to get out. I also made bangles with the same skin.

This was my first attempt at a small cat. Again no armature was used and I aimed at creating this cat out of one piece of black clay. The details like the nose, eyes, feet and tail were added and the white tummy bit. I then created the fur.

My next cat was the slightly bigger black and white cat – this was made by creating the main body shape and then adding haunches, feet, legs, tail and the head. A lot of smoothing was involved in the making of this and the other sculptures. The eyes were also made with clay, but after baking I painted the pupils in with black acrylic paint. The tail is attached to the back with a wire, while a toothpick was used to attach the head. The ears were also attached separately. Again after all parts were attached and smoothed I added the fur and whisker holes and nose holes with a tapestry needle.
Other cats followed the same way using different coloured clay.


I also tried my hand at a different posture – I really like it when cats rest with their paws stretched out so I made a cat in that pose (which has sold).
I adore sloths, so I had to make sloths too. My first sloth is a two-toed sloth or Choleopus. Its body has an aluminium armature. The head is attached with a toothpick. The eyes were way easier to create than those of the cats – I used small black glass beads for those.

The three-toed sloth – also known as Bradypus – was created using the same principle, but with different colours. The Sloth Sanctuary in Costa Rica really liked my sloths – which I am quite chuffed about 🙂

The next sculpture I made was this meerkat, because I love them and actually had the pleasure to meet them in a zoo as an experience. This sculpture also has a core made of aluminium. I found the fur the trickiest and the tail.


A lot of people on Facebook loved my octopus – and it’s actually one of the easier sculptures to make – though it got bigger than planned. This one has no aluminium core and the main body is one piece. However the tentacles were very fiddly to make and attach – especially the suckers! For the skin I made a bullseye cane and added thin slices to the body. To give it extra support I rested the octopus on a sheet of textured blue clay.

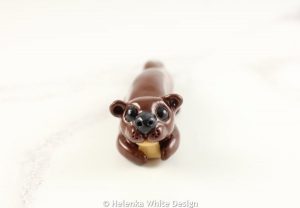
Another animal I love is the otter. You can read about my experience when I met Germany’s most famous otter Nemo here. He’s the inspiration for this sculpture. That sculpture has been sold but I have made a different one since.
Currently I am working on more cat sculptures including a sitting, resting and curled up Siamese cat. I will add them to the website next year, when they are ready. I also plan other animals such as foxes, penguins and badgers. I also want to experiment with creating eyes and using just Super Sculpey and acrylic paints instead of coloured clay. Both ways of working have their pros and cons.


Anyway – I hope this gives you an idea of how I create my sculptures. Feel free to comment below and share. Oh and if you follow me on Facebook you can see more work in progress photos.
Thanks for reading.
Helen x